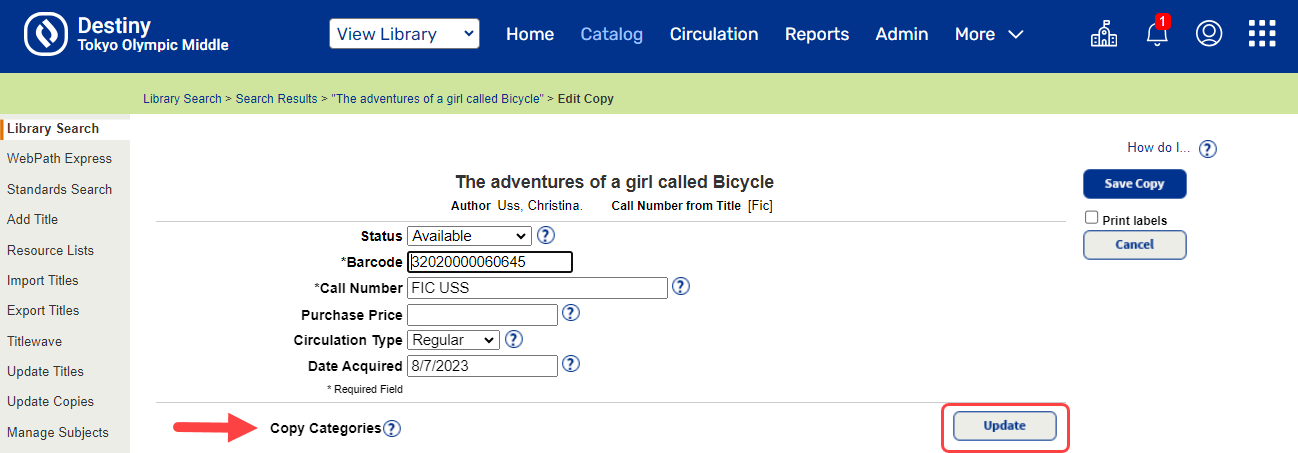
Update Copy Categories
You can assign one or more Copy Categories when you are adding or editing a copy record.
|
Note: Copy Categories created at the district level are only visible at the district; those created at the site level only appear at the site they were created in. |
To assign a Copy Category to a copy:
- If you are not on the Update Copy Categories page:
- Go to the copy record you want to assign a Copy Category to.
- Next to Copy Categories, click Update.

- Do one of the following:
If you want to...
Then... Assign the copy (or copies) to an existing Copy Category
Next to the Copy Category, select the Assigned checkbox.
Add a new Copy Category
- Next to Add Copy Category, type a unique name of up to 30 characters.
- If you want patrons to see the Copy Category when searching, deselect the Restricted checkbox.
Note: This option is not available when assigning Copy Categories at the district level.
- Click Add.
- Click OK to confirm your selection and return to the Add Copies or Edit Copy page.
- When you are done updating the copy record, click Save Copy on the Add Copies page or Save Copies on the Edit Copy page.
|
Notes:
|